How to Make Photon Torpedoes with Simple Lens
Flares
Open up Layout
Immediately save your scene file as Photon Torpedo Setup
then create a NULL object and call the null **Photon Torpedo
Controller**
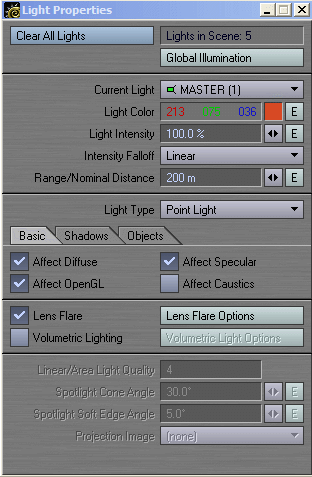
Then create a point light - call it Master
for the point light give it these properties in the light panel:
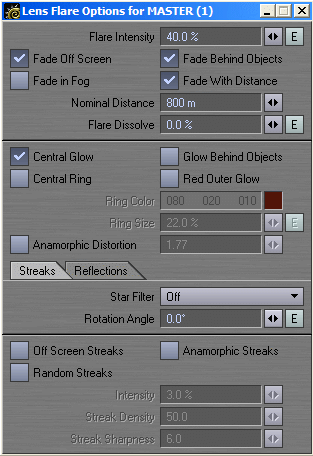
in the flare setting panel give it these settings:
with that done - parent that point light to the controller null.
Then make two cloned copies of that light - you will now end up with three lights each
called Master1, Master2 and Master3.
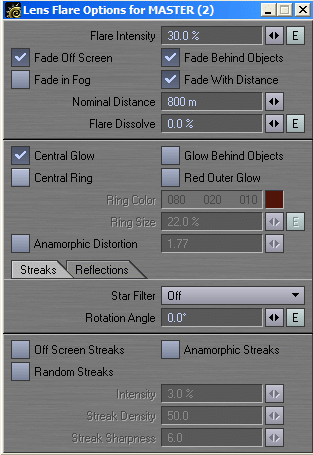
Adjust the settings for Master2 like this:
and the settings for Master 3 Like this:
As the second pair of point lights were clones they would all be
automatically parented to the null - so no worries there.
Now for the trademark photon streaks:
Clone Master 3 and then make the following alterations to that
light:
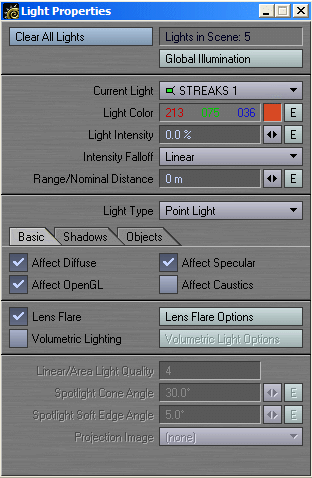
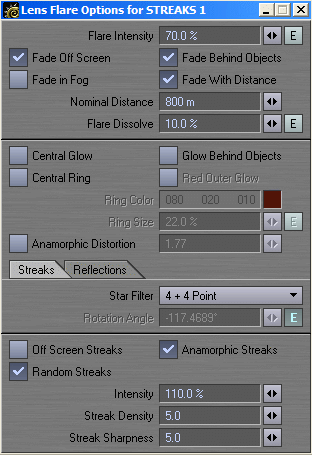
First rename it to "Streaks" and then make these adjustments...
Now click on the envelope button for the Flare's rotation angle and
set it to something along these lines..
When you've done that clone that Streaks light
you'll now have two identical streaks lights called Streaks 1 and
Streaks 2
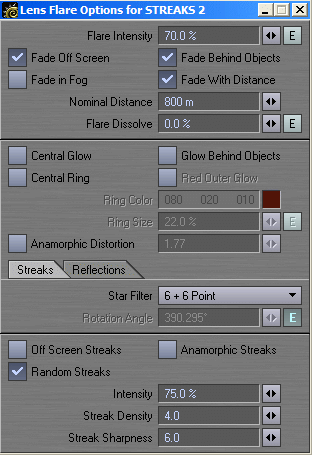
go to streaks two and adjust it's flareproperties
like so....
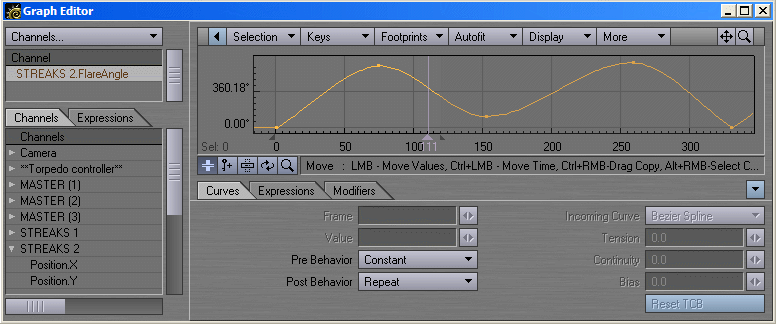
then open up the graph editor for Streaks 2 and adjust it's
properties like so:
What you've now done is create two point lights with varying rotations on
the streaks for the trademark photon effect
delete all other non essential lights from the scene and then save the
scene
you will now be able to load as many of these photons as you desire into
further future scene compilations
What does it look like when you key-frame the null and animate it??
like this: (each 300K)
you can easily make quantum torpedoes by loading the parent scene
template - changing all the colours to a suitable blue and then saving that as a
different template scene called Quantum's
NB. some users have reported seeing a
WHITE WALL when following this tutorial and have asked what the problem
is:
The problem is down to the fact that you have your camera too close to the
lights and thus when you render you get a scene that is flooded with the light
output.
The photon effects were designed to be used in scenes that included
starships that were typically up to 1000m in length or more and when representing the
photons flying between these ships the distances involved would easily be Kilometres
between starships. However when you are working on a very small scale such as say a
battle between smaller shuttlecraft the solution is to ramp down the NOMINAL
DISTANCE settings for each of the lights that have Lens flare properties to a
more suitable distance setting.
I would suggest creating a few sets of these photons for import that work
at various scales.


 Facebook
 Twitter