|
How to set up screamer painlessly!
|
- You obviously have a network setup -(or you wouldn't need
screamernet!) so we're going to assume a server PC and 4 other networked
workstations for this example.
- Note that all objects, textures and save file paths MUST be ~network
friendly~
- I.E.: having frames saving to 'C:\' is going to be a disaster as all
machines have their own C:\ drives.
- Better is to create two shared folders on your main
machine and map them to drive letters on ALL machines.
P:\ - contains LightWave content
R:\ - contains rendered frame
|
so on your main server machine create two folders
- call folder 1 MY LightWave CONTENT
- call folder 2 SCREAMER RENDERS
now map these folders as network drives:
- map MY LightWave CONTENT as drive
P
- map SCREAMER RENDERS as drive R
Do this by first creating your folder - then enable sharing on it
for the network. Next map that shared folder as a network drive with the right
Drive letter and find the folder by looking in your network in the shared folders for
the server PC. Go to each of your networked PC's in turn and again map that same
folder from your server PC to all of them
|
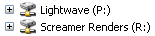
You are looking for this in the My Computer tree in explorer for all your
PC's
|
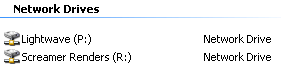
and it will look like this in My Computer from the start menu:
|
Now with that over with we need to setup up all the
common LightWave content so that all the PC's know where everything is. -
we do this by carrying out some subversive editing to the LightWave App
:-)
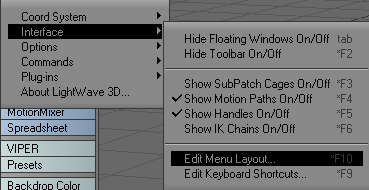
First open LightWave and Modeller and save the menu and keyboard configs
you have created to a suitable place
do that like this:
LAYOUT
|
once you have the menu layout panel open save the config to a suitable
location
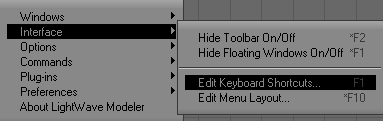
repeat the process for the keyboard shortcuts
do the exact same thing for
MODELLER
|
with your four configs saved we proceed to the next step.
Close all your LightWave app's - including the hub.
Now go to your LightWave folder on whichever drive it is installed and
MOVE ALL of the following folders to the new folder you created called MY
LightWave CONTENT:
|
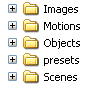
while you're at it move ALL folders that you have created in the
content directory that are specific to yourself to the very same folder.
As you may have surmised by now The screamernet nodes will all be accessing
this shared network drive for all the content they require - but there is one more thing
they will all need and that is access to all the plug ins that they will need to
carry out the rendering process - that's the next step.
Go to your root LightWave directory and MOVE the entire plug
ins folder to the same mapped network drive folder.
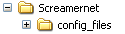
Then make another folder in your mapped P drive folder
called Screamernet - in that folder make one called config_files. Into this
folder move all of your LW *.cfg files from their original directory to this
Configs folder. You will find them in C:\Documents and
Settings\USER.
|
You should have something like this:
|
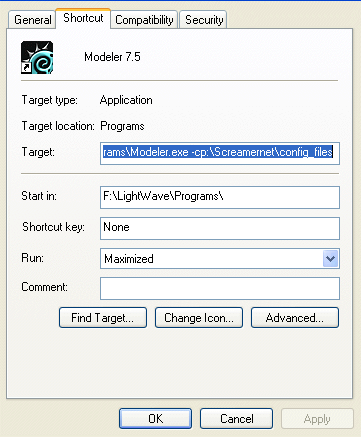
Now for the next step - we have to add a few things to the shortcuts that
we use to start our Newtek app's.
Go to the shortcuts you use and right- click properties for each one
to get this screen:
|
you can see there's already an extra bit of text on the end of the target
path - add this to each of the two shortcuts for Modeller and Layout:
*space*-cp:\Screamernet\config_files
this tells the shortcut for the app's that it's config files are in the
folder we specify in a new path in the P drive - so that it can find them when we
launch them.
|
Now for a bit of text editing of the config files. If you haven't done so
already associate a text editor with *.cfg files and then open the cfg
files for LightWave which are now in their new directory. Carry out a search and replace
to change all drive letter references to their new drive
for example change C: to P: wherever it is found and then
save them all and shut them down again
Now is a good time to point out that sometimes you may launch your app's in
the future and find that the layout has defaulted to the standard format as it was when
freshly installed - this is because the app's weren't able to find the new
path specified and reverted to default.
This is almost always because after a fresh reboot the networked
drives have not been accessed properly! Always access your drives prior to launching any
of the LightWave app's and now that the PC has "connected" to them you will launch
with all your saved configs intact!
Launch both app's - if all has gone well you should notice no changes - but
if for some reason something has gone wrong somewhere this is why we backed up or layout
and modeller settings - do the reverse of the earlier operations and reload you modeller
and layout menu and keyboard configs.
Then in the options panel set the new content directory
to P:\
|
and to be doubly sure everything is nice and intact access the
following:
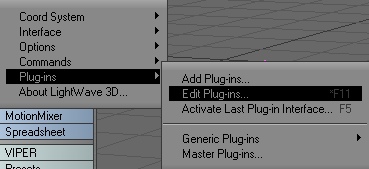
and tell the panel to scan the plug-in directory in it's new
location.
When done shut down both app's and the hub to save all the new data.
Re-Launch them both again to check everything stayed as it should have - if successful -
we can now move onto the next step - which is top setup the screamer nodes
themselves.
|
On each of the network workstations and the main server
PC open up Notepad or another suitable editor.
Type the following into Server PC's document
lwsn -2 -c[path to config files folder]
-d[path to content directory]\ [path to job file] \[path to ack
file]
so that would come out as:
lwsn -2 -cP:\Screamernet\config_files -dP:\ P:\Screamernet\job1
P:\Screamernet\ack1
then add the following text before that line
C:
cd C:\LightWave\Programs
lwsn -2 -cP:\screamernet\config_files DP:\ P:\screamernet\job1
P:\screamernet\ack1
|
- the first line defines the drive
- the second defines the location of the program
folder
- the final line defines the commands for screamer.
- Save that file as a text file called Screamer.txt in the
Programs folder in the root LightWave directory where you have it
installed.
- Rename the file to Screamer.bat
- assign a text editor to that file type in the windows
options.
|
|
For each of the remaining four PC's in this example create a directory on their
C drives called LWScreamer or whatever you fancy -- inside that folder COPY the
entire program directory of LightWave from the HOST/server PC to these folders on each of the
other PC's
As before in the open text editors on these machines type the
following:
|
|
|
|
PC3:
- C:
- cd C:\LWScreamer\Programs
- lwsn -2 -cp:\Screamernet\config_files -dp:\
P:\Screamernet\job3 P:\Screamernet\ack3
|
|
PC4:
- C:
- cd C:\LWScreamer\Programs
- lwsn -2 -cp:\Screamernet\config_files -dp:\
P:\Screamernet\job4 P:\Screamernet\ack4
|
|
PC5:
- C:
- cd C:\LWScreamer\Programs
- lwsn -2 -cp:\Screamernet\config_files -dp:\
P:\Screamernet\job5 P:\Screamernet\ack5
|
|
observe all spaces!
Note that each machine MUST have a different node number (the number
that identifies the job and ack files)
save all these files as Screamer.bat files in the LWScreamer
folders
you're looking for this in each machine:

|
|
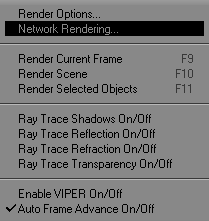
Back to the main PC now - Launch
layout
Launch the screamer interface and choose ScreamerNet II from the top
drop down menu:
|
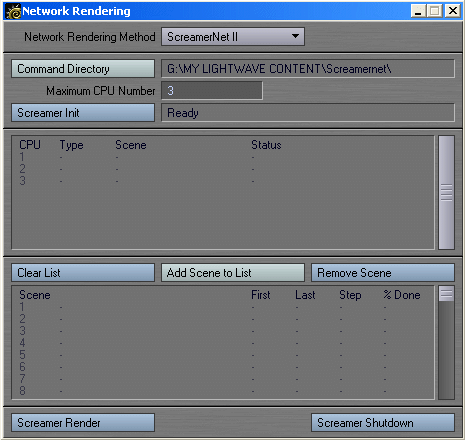
|
in this interface you can set the number of CPU's you want
to run - for now I have chosen just 3.
on all of the machines - start up the screamer Nodes - I made shortcuts to them
on each desktop for ease of use
|
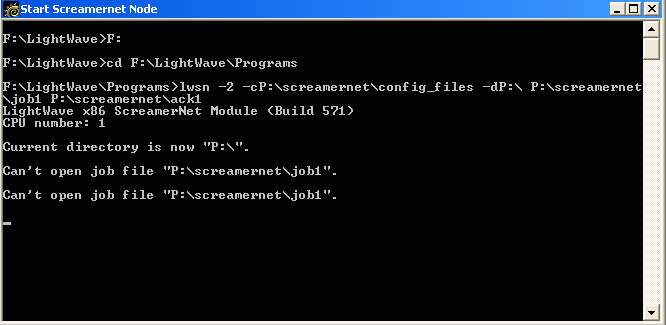
|
you'll be presented with this:
|
|
This is entirely normal as screamer hasn't been
initiated yet so it can't find anything :o)
back to the screamer interface now:
Hit Screamer Init and wait for all the CPU's to register with the
panel:
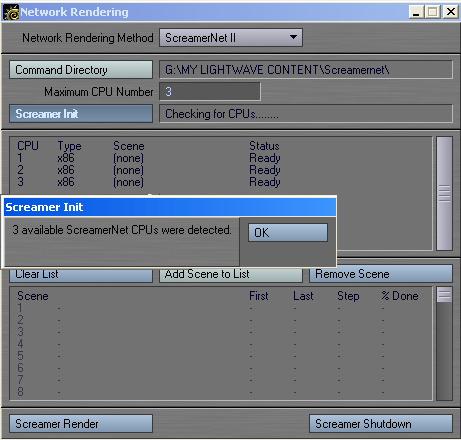
|
|
as you can see all CPU's found and ready - this is reflected in the node
windows now by this repeating line:
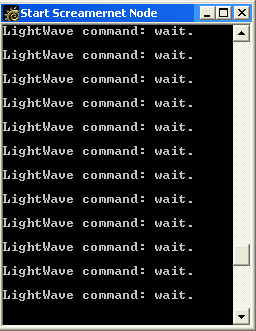
|
|
now back in the screamer panel add a scene to the list that you want to render
(you can add up to 100 of them) ensure though that in the scene you have set render
output to single frames and to be saved in the R mapped network drive!
:o)
then hit screamer render - that's it!
|
-
each node will happily load the scene file - render it's
allocated frame and save it to wherever specified in the R drive by the
scene file
-
you can at any point abort by hitting ESC
-
when finished hit the screamer shutdown which will close all the
nodes running on each of the machines!
Well there that's it! Hope this helps you out! All the best
Fabs'
|
|
| N.B Many thanks to Kier Darby of AP3D com for his original instruction in the
intricacies of SN2 setups in this fashion - much appreciated mate! ;o) |
| |
|
Need help detailing
your spaceships? Have to make a cityscape fast? Need to fill any area with random believable
detail?
The
Ultimate Greeble & Nurnie Collections will make light work of any of your Projects! Check them out now!

|
 Facebook
 Twitter