Making Aztec patterns for Star Trek Ships

There are a few methods for making Aztec Patterns for Trek ships. Many of them require the use of the program Adobe Illustrator - but not many people may wish to forego the cost of this program in order to create these maps - especially when most of the time that would be their only use for the program. Below I will detail a method for creating these Aztec patterns using both Modeler and Adobe Photoshop.

To start with you'll need to get a screen grab of the saucer hull in Modeler So do that first and then paste it into Photoshop as a new document

this technique only requires us to have a section of that screen grab - so we first must crop our image down like this

Now in Photoshop we must first increase the resolution of the image so that our resultant map does not appear pixilated when we eventually apply it. So using Image - Image size - adjust the height to about 800 and let the other dimension re-size proportionally and then hit OK. The result is that the grab will now itself look very pixilated. This doesn't matter as it will just be serving as a drawing guide for us.

Then create two new layers - fill the first layer with a uniform white and then adjust the opacity so that you can see the background image better. Then estimating a good width for the Aztec pattern on the outermost edge of the saucer make a suitable selection with the selection tool as shown below.

Now at this point use your artistic skills and the tools within Photoshop to come up with a nice Aztec pattern to your liking - along the lines of the one shown below..


When you've done that name the layer Aztec master 1 and then create a new layer - name the new layer Blocks. Make the Aztec master 1 layer opaque so that you can now use that as a guide to build your block pattern - which should end up looking something like this...

Now obviously this is a quick and dirty way of doing this. If I were to do it properly I would naturally take my time over it - but it's a tutorial we're doing here - not a work of art! ;o) Also it is worth mentioning that with illustrator the best way to handle this would be to make a circular grid and just use the fill tool ;o)


OK - now we have 4 Photoshop layers - the background layer - the white layer the Aztec layer and the blocks layer. What can we do with them then? We can now use the polar coordinates filter after a bit more work.


Select the Aztec master 1 layer copy it and paste to a new document. We're almost there but we have to do one more thing first. Increase the Canvas Size to double the width of your current image - ensure the image is placed to the right and knock relative sizing off - you should get something like this...

now select the Aztec pattern on it's own - copy and paste it back into a new layer - flip it horizontally and move it across to the other side of the canvas - like so...

finally invert the duplicate layer like so:

Now we have our basis for the Aztec pattern.

Now we have to duplicate this pattern a few times to prepare for the polar coordinates filter. So similarly to before - increase the canvas size to a suitable multiple of the current image width and ensure the original is placed on the left hand side. So for instance if you wanted say 12 of these patterns to form the final hull Aztec you would multiply your current image width by 12 for the new canvas size. The end result should look like this.

Now we simply copy and paste this pattern 11 times across this canvas till we get this result..

This now is the basis for the Aztec pattern for the polar filter which we then run...

Filters - distort - Polar coordinates

but before we do this we need to ensure the image we will run the filter on is "square"; as a rectangle the polar coordinates filter will merely return an elliptical result - which naturally can be handy for elliptical trek hulls! ;o)

so prepare the image by re-sampling it to a suitable square size like this...in this example mine was 5200*5200

now I've found that the polar filter tends to dislike images greater than 4000 pixels in width - so re-sample to something like 3800 - retaining the 
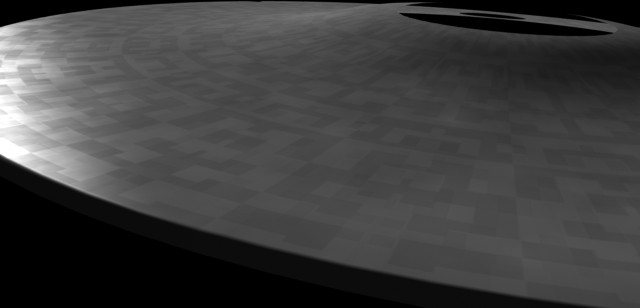
proportions and then run the filter.- your result should look like this..

Now that the Aztec pattern is done you can re-sample it down to a more respectable size for the image map of say 2000x2000.


Now you must repeat the exact steps you have taken for the Aztec map again for the block map

se here is an image sequence of what they will be..

next adjust these maps with brightness and gamma - whatever - to get tones along these lines...

now to apply these maps to our saucer hull - I suggest the following settings...

Diffuse - Aztec map - 30% with blocks map at 10% above the Aztec texture layer

Specular - Aztec map - 75% with the blocks map above that layer set at 30%

these are good figures to start with but depending on the gray tones you used with your images the opacity of the maps and their gamma in the image editor may have to be edited to get really good results - but after a bit of tweaking you should end up with something like this..


Need help detailing your spaceships? Have to make a cityscape fast? Need to fill any area with random believable detail?

The Ultimate Greeble & Nurnie Collections will make light work of any of your Projects! Check them out now!

check out the ultimate nurnie collections!

 Back to top